Here is a quick tutorial on how to create your own sunburst background texture in Photoshop with an added a grunge style to it. We will be using smart filters and a very useful technique called step and repeat.
Details
- Created in: Photoshop CS3
Steps
Step 1: Setting up the background.
Let's begin by using a texture that has a subtle grunge style to it. You can download the texture here.
Once you have a copy, open it in Photoshop (Ctrl+O). You can resize the image (Image » Image Size... or Alt+Ctrl+I) if you want to.
Step 2: Creating the sunburst.
Layer and tool settings.
Create a new layer (Shift+Ctrl+N) above the texture/background. Let's just call it "strip". Then group this strip layer (Ctrl+G) and name it as "stripes". To rename a layer/group, just double click its name on the Layers panel.
Switch to the Rectangle tool (U) and set it to Fill Pixels. For the Foreground color, use #e87b06.
Creating the stripes using step and repeat.
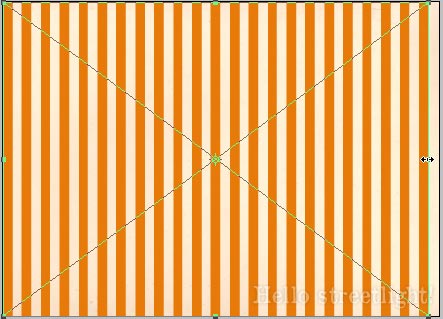
Now on the strip layer, create a strip on the left edge of the canvas.
What we are going to do here is to fill the entire canvas with stripes. To avoid doing this manually, we are going to use step and repeat.
Hit Alt+Ctrl+T to duplicate the strip layer and activate the Transform tool. Hold down Shift (to retain alignment) then drag the strip to the right. Make the gap between them about the size of the strip itself. Hit Enter when you are done.
Now hit Alt+Shift+Ctrl+T to repeat the process of duplicating the layer and moving it to the right. Use Alt+Shift+Ctrl+T repeatedly until you completely filled the canvas with stripes.
Once done, right click the stripes group then select Merge Group (Ctrl+E) so that we only have one stripes layer to work with.
Adding the sunburst effect.
Next we are going to use a smart filter to achieve the sunburst effect. You will see later on how this is different from a regular filter.
First, convert the stripes layer into a smart object so that we can use smart filters (Filter » Convert for Smart Filters).
Next, go to Filter » Distort » Polar Coordinates... then select Rectangular to Polar.
Tweaks and adjustments.
On the resulting picture below, notice that one of the rays appear to be too wide - this is because the gap between the first and last stripe is very tiny.
If you are seeing the same problem on your image, you can fix this easily by transforming the stripes layer (Ctrl+T). A message box about not seeing a preview of the filter effect may pop-up. Just click OK. Now try adjusting the width of the stripes so that the right edge is a gap as wide as the other gaps as shown below.
Hit Enter when you are done.In case you still haven't got the gaps right, just try transforming it again until you're alright with it.
Note that with regular filters, adjusting the effect is not possible. You would have to do the process of creating strips and applying the filter all over again.
Step 3: Adding a grunge effect.
Change the stripes layer's Blending Mode to Color Burn. You can of course try other Blending Modes. Just experiment and have fun!
Next is to duplicate the stripes layer (Ctrl+J). Now on the stripes copy layer, right click then select Rasterize Layer.
Rasterizing the layer will apply the smart filter to the layer permanently and is no longer editable. This is needed so that when we rotate the layer (which we will do next), the Polar Coordinates filter, which relies on shape and position, will not kick in and update. Try rotating the layer without rasterizing first and you'll get a better idea of what I mean. -_- I apologize for the lack of a better explanation.
Alright so switch to the Transform tool (Ctrl+T) and rotate the stripes copy just enough that it appears slightly unaligned.
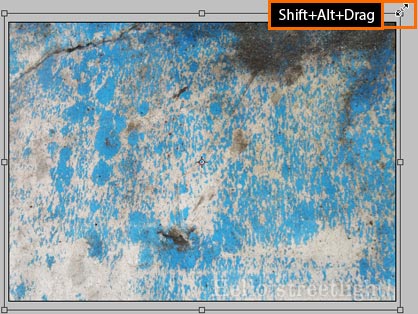
When rotating the stripes copy, unwanted edges will show. To fix this, resize the layer by holding down Shift+Alt while dragging the corners of the bounding box outwards until the edges are hidden. Note: Shift retains the proportion while Alt allows resizing from its center.
Hit Enter once you are done. If you want the sunbursts' color lighter, try adjusting their opacity. I used 60% on both the stripes and stripes copy layers.
Now we can add a more grungy effect to it. Download this grunge texture or if you want, pick out your own here.
Once you have a copy of it, open it in Photoshop (Ctrl+O). Select the entire image (Ctrl+A) then copy it (Ctrl+C). Switch back to your sunburst document then paste it (Ctrl+V) above the stripes copy layer.
If you haven't resized your document and used the same texture as I have, you will see that the texture is much smaller. Just resize it like we have done earlier. Switch to the Transform tool (Ctrl+T) then Shift+Alt+Drag the corner until it covers the whole canvas. Hit Enter when your are done.
Now experiment with the texture's Blending Mode to see which effect you like best. I settled with Color Burn once again. You can also adjust the Opacity if you want.
So there you have it! Just play around with the colors and blending modes. Try out different textures or add more if you want to.
Anyway I hope this tutorial helped you and if there is anything I missed or messed up, give me holler. Comments are most welcome!
Download | jpg file (10.6 MB)
This will take you to the download page in a new tab.


I never knew how these were done! Thank you! You have an awesome site!
ReplyDeleteSu
Great stuff. Just wanted you to know I used this in my latest image
ReplyDeleteand credited you on the blog post.
http://beartoons.com/2013/01/23/wwe-3mb-aka-ginger-mac-hal/